- Installation and setup of satellite television
- Choose a device
- Preparing to install
- What is included?
- Plate
- Convector
- Bracket
- Installation procedure
- Connection
- Tuner tuning
Or how to set up the TV channel Curlers, Kiev STB and others independently.
From March 1, 2017, reception and viewing satellite channels Of Ukraine 1 + 1, 2 + 2, TET, PLUSUS, 1 + 1 International, UNIAN TV, BIGUDI, will be possible only on Astra 4A satellite. To further view these channels you need to reconfigure your equipment.
Technical parameters for all channels of the group 1 + 1 media (ASTRA 4A):
Satellite - Astra 4A (SES Sirius)
Frequency - 11766 MHz
Character speed - 27500
Polarization - horizontal (H)
So, self tuning satellite channels of Ukraine:
1. Click -Menu.
6. In the drop-down list we find the frequency 11766/27500 H, and “OK”.
- Network Search - On
- Click "OK" to search.
You also need to add and then scan on the satellite Amos 4W, frequency 11175/30000 / H, for this:
1. Click -Menu.
2. Select the "Installation" and click "OK".
3. In the line "Satellite" - choose Amos 4w and "OK". Other parameters do not need to change.
4. To edit, press the yellow button at the bottom of the console.
5. Select, i.e., move the cursor to the line “TP number” and press “OK”.
6. In the drop-down list, we find the frequency 11175/30000 H (the following cycle: 11140/30000 / H), and “OK”. If there is no such frequency, it should be added (green button) and saved.
7. Press the red button at the bottom of the console to search for programs.
8. A window appears in which you must set the search parameters.
- Search Mode - Open or FTA (to search only open programs)
- Program type - TV channel or TV channel + radio
- Scan Type - Manual Search
- Network Search - On
- Click "OK" to search.
Everything! Search is done. The programs found will appear at the bottom of the list of programs in the All Programs folder (All satellites).
However, following this instruction, we will find a group of programs on only one given frequency. And if the list of programs has not been updated for a long time, I would advise you to scan the entire satellite. It is very easy!
For this:
1. Click -Menu.
2. Select the "Installation" and click "OK".
3. In the line "Satellite" - choose Astra 4.8E, or may be called Sirius 4.8E (Sirius) and "OK". Other parameters do not need to change.
4. To edit, press the yellow button at the bottom of the console.
5. Press the red button at the bottom of the console to search for programs.
6. A window appears in which you must set the search parameters.
- Search Mode - Open or FTA (to search only open programs)
- Program type - TV channel or TV channel + radio
- Scan Type - Manual Search
- Network Search - On
- Click "OK" to search.
Everything! Setup of satellite channels of Ukraine is completed (for more detailed settings, watch for transponder changes). In this way, you can upgrade programs on the AMOS 4W and HOTBIRD 13E satellites.
After scanning, enter the Edit Channel menu and delete unnecessary and inactive programs.
Satellite data transmission technology can be found in almost every home. Many users believe that installing and configuring satellite TV is a very complicated procedure. In fact, there are practically no particular difficulties in all these manipulations. The most important thing is to understand all the most important nuances. How to setup satellite dish yourself? The answer to this question can be found in this article.
Installation and setup of satellite television
Satellite television is increasingly gaining popularity among users. It's all quite simple, because the subscriber does not always like the list of channels from cable. Yes, and TVs with Full HD quality requires high-quality content, with which the satellite copes with a bang.
Of course, no one will prevent you from connecting and installing digital cable TV, but the assortment of TV channels will be several times smaller if you compare it with what the antenna can provide.
Important! The price of the device does not exceed the cost of cable TV. In addition, you can easily install anywhere in country house or at the cottage, with what cable TV is not yet cope.
Choose a device
Before installation, it is worthwhile to choose the operator, whose services you will use. In other words, we need to choose an antenna. If you are new to this business, then you are lucky, because now we will talk about the nuances of choice in more detail.
So, the whole point of this television is to receive the signal straight from the satellite, which flies somewhere in space. The satellite transmits a signal, the tuner processes it, and only then we see the results on the TV screen.
Today, open and coded channels can be distinguished. The whole list can be placed separately, and can be included in the package of channels owned by the operator. TV coding is needed only to monetize watching channels. Satellite operators therefore exist, making viewing more convenient.
Important! For reference, the Russian-speaking broadcast comes from completely different satellites that are located in different positions. To receive a signal without interference, you need to send your antenna straight to the desired satellite. If the selected paid satellites are nearby, then there is a chance that you will be able to receive the signal from both at once.
Here are some important points:
- If you would like to watch 30 dev paid channels in Russian, then send your device to a satellite with the name “YAMAL 201”. There are many other satellites, but “YAMAL” is best filled.
Important! If we talk about the choice of the operator, it is best to give preference to Tricolor-TV, NTV-Plus or Rainbow-TV. More information can be found on the official sites of operators.
- You need to highlight one more thing: do you need paid or free broadcasting? To find free content, you can use the special service Frocus.net. To connect paid channels use the official sites of satellite operators.
Important! There is good news for owners of a widescreen TV - some operators have already started broadcasting in HD quality.
- There is another nuance - the direction of the antenna to the satellite. Everything will depend on the location of the device. The windows of your apartment can go in the wrong direction, so you have to have the installation directly on the roof. If the chosen direction cannot be reached for any other reasons, then it is worth choosing another satellite.
In order to install the satellite antenna yourself, you need to properly prepare. Now you know exactly how.
Preparing to install
If you have already decided on the satellite, equipment and operator, then you can safely run for a new purchase. In order not to float in terms, let's talk about all the components that will be included.
What is included?
- A tuner (receiver or receiver) is the device that receives the signal and converts it for later viewing on TV.
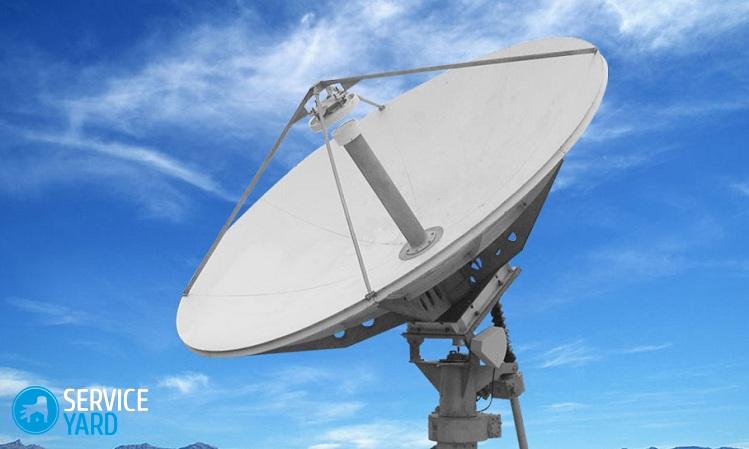
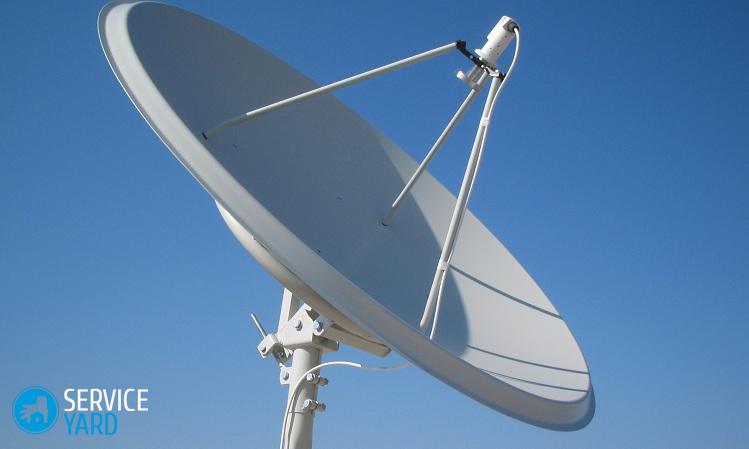
- Plate (antenna) - this device is needed in order to receive a signal from the satellite. Waves are reflected from the plate and run into the convector.
- Convector This gadget is engaged in receiving the signal that reflects the plate. The convector itself redirects the converted signal to the tuner.
- Bracket is metal construction that captures all the equipment.
- The cable is a special coaxial conductor connecting the convector and the receiver.
- DiSEq is a special device that is necessary to connect several convectors into one cable.
- F-ki. With these devices, the cable is connected to the rest of the components.
- Well, the basic set of connecting wires: tulips, SCART, HDMI cable.
Before you take on satellite TV with your own hands, let's talk about all this equipment.
Plate
When choosing a plate it is worth looking only at its diameter. 90 centimeters are enough for a good reception. But those who are going to receive signals from several sources at once should take into account the dependence of the diameter on the degree distance between the satellites.
Convector
It's not all that easy either. The polarization of the convector depends on the satellite. Here you should not neglect the advice of a specialist.
Important! Those who plan to watch both on TV and on a personal computer at once should get a two-way convector.
Bracket
This design is pretty simple. Usually it keeps on 3-4 anchors. Choose a bracket with a length of legs, which will allow you to safely rotate the antenna in the desired direction.
How to set up a satellite dish yourself? Here we come to the answer to this question.
Installation procedure
The entire assembly takes place according to the enclosed instructions. In order to finish the job, you must follow these tips:
- Choose the right dish direction. This will help you a special service agsat.com.ua/satdirect. On the map you just need to poke the checkbox of the installation location, and in the side column of the interface select the desired satellite. The software will prompt you the right direction.
- Before you install the plate, it is better to check the quality of reception without fixing, holding the device in your hands. If the reception from the satellite is not below 70 percent, then you can proceed to the installation.
- If you picked up and determined the installation location, then take a punch and make holes for the installation of the bracket. Anchor must be chosen, starting from the material of the wall and the massiveness of all equipment.
- After fixing the bracket, take up the mounting plate. Do not rush to tighten the screws, as you still need to specify the exact direction.
Installing a satellite dish yourself now should not cause questions, but how to configure and connect all the equipment?
Connection
In order to connect everything, you need:
- Cut about 1.5 cm of insulation from the cable and bend it in the opposite direction. Cut the foil screen 1 cm.
- Screw the F-ku on the prepared end of the cable.
- Repeat the manipulation with the other end and connect it to the receiver. The first end must be connected to the convector.
Important! After fixing and connecting, you need to set up the dish on the satellite. For correctness it is better to use a compass and a signal level in the tuner. If you managed to achieve excellent reception quality, then fix the nuts on the antenna and its fasteners. Then fix the cable itself.
Tuner tuning
- Select a language in the tuner menu.
- Compare the version of your firmware with the latest one.
- Set the correct time and time zone.
- Select the desired satellite and complete its settings.
- Now display the level of the signal on the display. If the quality of the proper level, then start scanning the satellite, which will give you access to TV channels.
Now you should have no questions about how to set up the satellite dish yourself and connect it. And if you do everything, guided by our advice, high quality TV with a wide range of channels is provided to you!
New satellite reception parameters for TV channels
Satellite broadcasting parameters for channels 1 + 1, PlusPlus, Unian, Curlers, Music Box, O-TV :
- Satellite - Astra 4A (SES Sirius) In some tuner models, the satellite may be called “Sirius 2/3” or “Sirius 4”;
- orbital position - 5 ° east. e. (E) (may be referred to as 4.8 ° in some tuners);
- frequency - 11766 MHz;
- the symbol rate is 27.5 Msymb / s (MSymb / s) or 27,500 ksym / s (ksymb / s);
- FEC - ¾;
- Modulation - DVB-S (QPSK).
Satellite broadcasting parameters for STB, Novy Kanal, ICTV, M1, M2, QTV, 24 channel, TONIS channels:
- satellite - AMOS-3. In some models, tuners may be called “AMOS”, “AMOS 1”, or “AMOS 2”;
- orbital position - 4 ° W;
- frequency - 11 176 MHz;
- the symbol rate is 30.0 Ms / s (MSymb / s), or 30,000 ks / s (ksymb / s);
- polarization - horizontal (H);
- FEC - ¾;
- Modulation - DVB-S (QPSK).
When scanning a transponder, one more “1 + 1” channel is not detected in the list of TV channels.
Most likely, the channel "1 + 1" appeared in the list of radio channels. Delete it, please (procedure - according to the instructions for removing TV channels, just select the radio channels), and rescan the transponder again. After that, the TV channel "1 + 1" should appear at the end of the list of TV channels.
After scanning with new parameters, the channel "1 + 1" appeared in the list, however, there is no image
Instead of the frequency 11766, enter the frequency 11765 and scan the channels again. At the end of the channel list, "1 + 1", "TET", "2 + 2", "Unian", "Bіgudi", "PlusPlus", "Music Box", etc. will appear. After that, delete the previously added channels from the list and leave just scanned. An image should appear on the newly scanned “1 + 1” channel.
What changes in the field of television will occur in the near future, how will this resource help me?
In 2016-2017, more than 40 Ukrainian TV channels change the parameters of satellite broadcasting. The changes are due to objective reasons, in particular, the end of life of individual satellites. Telemaster collects and publishes new broadcasting parameters and instructions for setting up TV channels with new satellite broadcasting parameters. In addition, in 2017. planned to completely disable analogue television broadcasting (deadline to shutdown until June 30, 2017.). Users of analog television broadcasting will have to choose alternative options for receiving and viewing television programs. Our resource will help in choosing a wizard for installing or repairing a television antenna, tuner, TV.
What is the purpose of the site?
Changes are taking place on the Ukrainian television space: the channels are changing the broadcasting satellites, the transition from analog television on digital. TV, antennas, tuners also need to be repaired or replaced from time to time.
Telemaster cooperates with leading Ukrainian television channels and provides detailed information on changes in the parameters of broadcasting and on the list of TV providers with whom the channels have agreed to retransmission. In addition, Telemaster is a resource for finding masters and placing applications for the installation, repair and commissioning of television antennas, televisions and TV tuners. Telemaster Resource Partners - Qualified Television Masters and service centres throughout the territory of Ukraine.
The goal of Telemaster is to help viewers set up television equipment independently and free of charge and, if necessary, to connect masters and viewers who need the help of a specialist. We will accept your request for repair of the TV, tuner, antenna and give it to the free master in your area. You will save your time searching for a master, and a qualified master will get a job.
How to use the site site?
The site contains instructions for TV channels on setting up new broadcast parameters on satellite TV tuners. Information will be updated in the form of text and video instructions for viewers. Using the instructions you can reconfigure your TV tuner yourself.
TV viewers who need the help of a wizard to reconfigure the tuner and / or other works on setting up, repairing the TV, tuner, antenna, can place a request on the website or by calling 8282/0800 50 8282. Placing an application is free - you only pay the master for it work
Can I call a specific Master?
We distribute applications in the regions of Ukraine automatically among all free registered masters. We will take your wish into consideration, but we cannot guarantee that a particular master will receive an application.
How much will it cost to reconfigure the parameters of Ukrainian channels?
The minimum cost of the application is 300 UAH, which includes the departure of the master to the location of the equipment at the date and time agreed with the client, conducting diagnostics of the receiving system (antenna, tuner, wiring), setting new parameters of Ukrainian TV channels for ONE piece of equipment OR minimum adjustments an already installed antenna system with the possibility of direct access by the master to its elements (without replacement of components). The final cost of work is determined by the master after on-site diagnostics.
How to reconfigure the channels?
Reception satellite tv conducted through the tuner. A tuner is a small device connected to your television. On the front panel of the tuner, find the name of your tuner model. After that find your tuner in tuner list . If your tuner is not listed, it is possible that such a tuner model is not very common in the market or is obsolete. In this case, we suggest you use general instruction ( text / video ), or ask for help to the master .
How can I refuse a completed application?
Call Telemaster operators at 8282/0800 50 8282 and report it.
I did not find instructions for my tuner, what should I do?
We have posted on the website instructions for the most common models of tuners used now in Ukraine. Perhaps your tuner model is missing from this list if such a tuner model is not very common on the market or is outdated. In this case, we suggest you use the general instruction (
You need to highlight one more thing: do you need paid or free broadcasting?What is included?
How to set up a satellite dish yourself?
Installing a satellite dish yourself now should not cause questions, but how to configure and connect all the equipment?
What changes in the field of television will occur in the near future, how will this resource help me?
What is the purpose of the site?
How to use the site site?
How much will it cost to reconfigure the parameters of Ukrainian channels?
How to reconfigure the channels?
How can I refuse a completed application?